Monitoring your Carel BOSS devices over Redfish — from zero to a working API
Contents
Carel BOSS has a quietly powerful feature that almost nobody uses: a built-in Redfish server. With a bit of setup you can read live data from every controller wired to your BOSS — temperatures, pressures, setpoints — and even write values back, all over a clean, standard REST API.
This guide takes you the whole way, in plain steps: what Redfish is, how to turn it on, how to build a template that maps your real devices (we’ll use an IR33 controller and a uChiller), how to import it, and finally how to browse it all in Bruno. Everything here was done on a live BOSS.
1. What is Redfish, and why use it on BOSS?
Redfish is an industry-standard REST/JSON API (from the DMTF) for managing equipment. It’s built on OData v4, so every resource has a stable URL and links to its neighbours — you navigate it like a web of JSON documents.
On BOSS, Redfish is a server: BOSS publishes the API, and your tools connect to it. Why bother, when BOSS already has a web UI?
- Integration. Any monitoring system, script, or dashboard that speaks REST can pull your plant data — no scraping, no custom protocol.
- Live device data. Read the actual temperature a controller sees right now, its setpoint, an alarm state.
- Two-way. Where allowed, you can write a setpoint — i.e. send a real command to the controller.
- Standard. It’s plain HTTPS + JSON. Browser, Postman, Bruno, curl — all work.
The catch: out of the box Redfish only exposes management resources (sessions, accounts, firmware). To see your devices, you build a small template. That’s the heart of this guide.
2. Redfish is a BOSS plugin — make sure it’s available
Redfish ships as an optional module (plugin) inside BOSS. It becomes available when your license package includes the “Redfish Server” function. When it’s licensed, a Redfish Server page appears under the Data Transfer area of the BOSS web UI.
How to tell it’s there:
You can see the Redfish Server tab in Data Transfer, and
A quick check from any browser (no login needed):
https://<your-boss>/redfishA licensed, running service replies with
{"v1":"/redfish/v1/"}. If you get405 Method Not Allowed, the function isn’t licensed or the service is off.
If you don’t see the page at all, it’s a licensing matter — talk to your Carel distributor about enabling the Redfish Server function for your installation.
3. Start the Redfish server
Open the Redfish Server tab. At the top you’ll see Service state (it starts as Stopped), and below it the Redfish configuration panel.
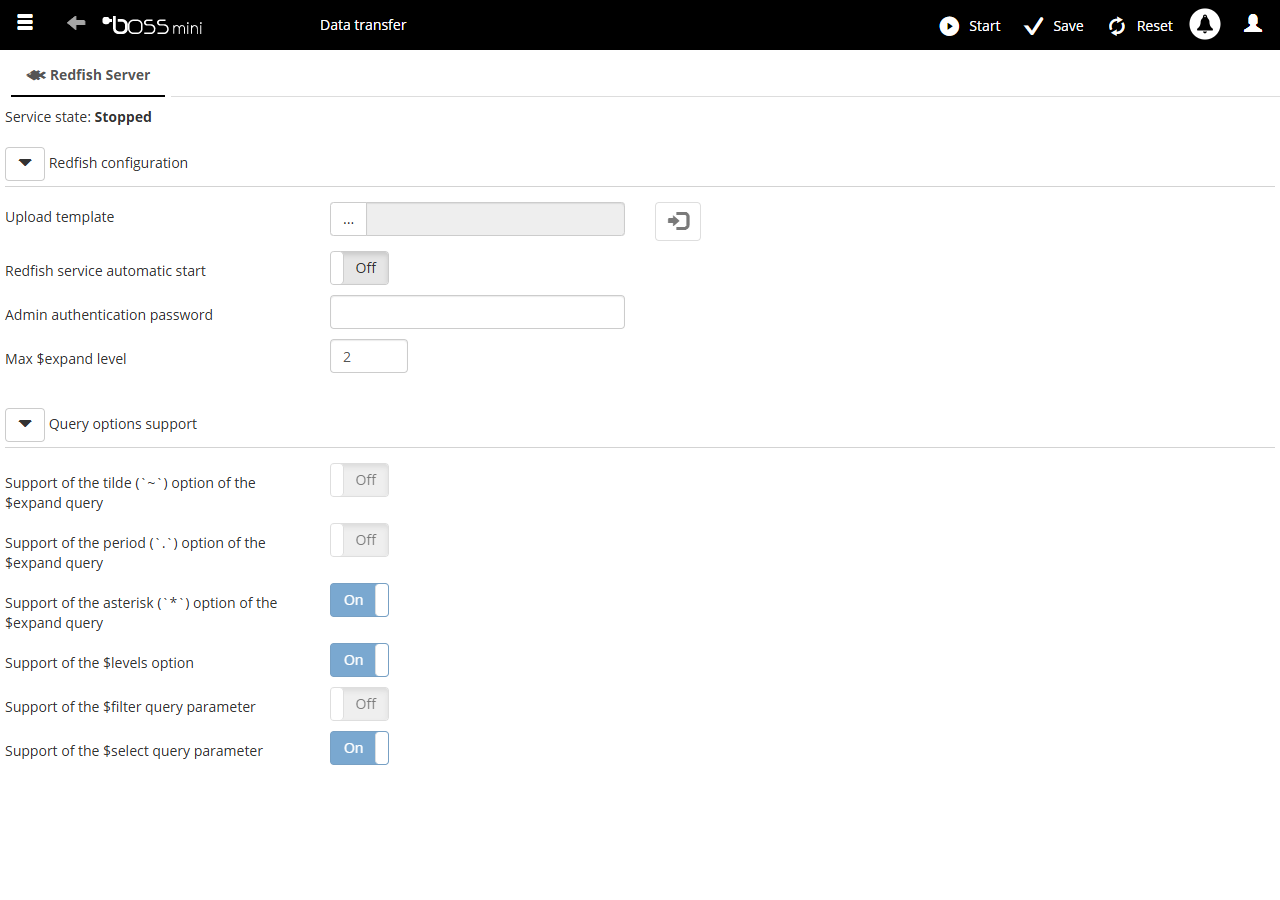
Do three things:
- Admin authentication password — set a password. This is the password for the built-in
adminaccount you’ll use to log into the API. - Redfish service automatic start — turn it On so the server comes back after a reboot.
- Save, then Start the service. Service state should switch to Running.
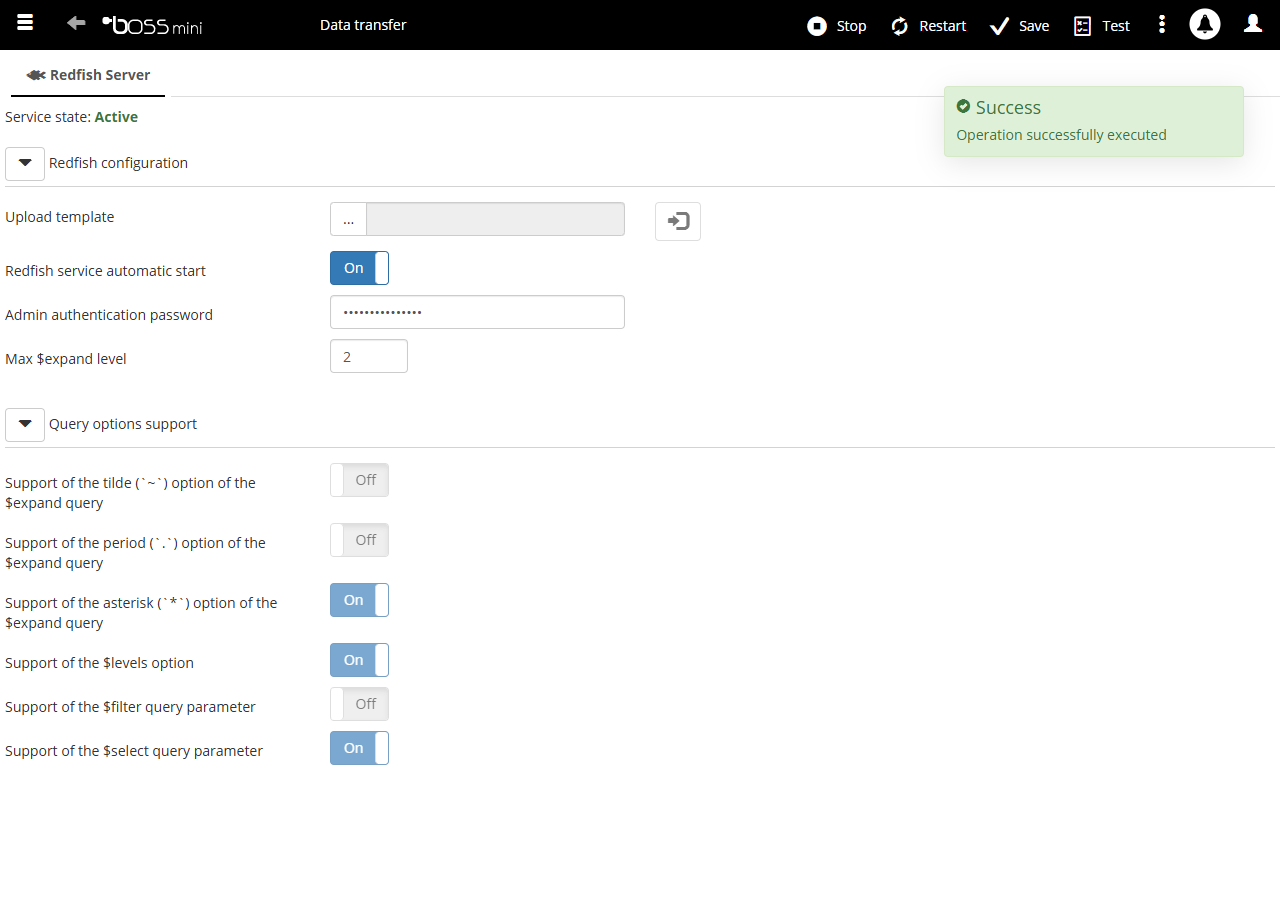
Sanity check from a terminal (the self-signed Carel certificate is why we pass -k):
curl -sk https://<your-boss>/redfish
# {"v1":"/redfish/v1/"}
That’s the whole server setup. Now the interesting part.
4. The big idea: a template maps your devices to Redfish
A mockup template is a small .zip you upload on that same page. Inside, it follows the standard DMTF Redfish layout:
- one folder per resource, and the folder path is the resource URL (minus
/redfish/v1); - each resource is a single file named exactly
index.json; - inside a file, a value can be a placeholder — a token that BOSS swaps for a live value on every request.
So to show “IR33 #1 regulated temperature”, you create a Sensor resource whose Reading is a placeholder pointing at that controller’s temperature variable. When someone reads the resource, BOSS fetches the current value. When someone writes a writable property, BOSS sends the command to the device.
Let’s build one.
5. Step by step: building the template
We’ll expose three “chassis”: BOSS (supervisor health), IR33_1 (a controller), and uChiller.
Step 5.1 — Find your device and variable codes
A device placeholder needs two text codes: the device code and the variable code. You can read both straight from BOSS — no database, no SSH. BOSS publishes a datapoint list (used internally for its tVise/SVG maps) at:
https://<your-boss>/boss/servlet/acquiredp
Open it in your logged-in browser. It’s an XML tree:
<!-- a device:  name = "<deviceCode>.<description>" -->
<item name="1.001.IR 33 DIN - F - 1" type="#IR 33 DIN - F" />
<item name="9.001.uChiller - 1" type="#HECH_BLDC" />

<!-- a variable: name = "<description> | <VARIABLE_CODE>" -->
<item name="Set point | SET_POINT" type="number" />
<item name="Discharge press probe of circ1 | dSP1" type="number" />
- Device code = the part before the first description, e.g.
1.001(IR33 #1) or9.001(uChiller). - Variable code = the token after the
|, e.g.SET_POINT,AMB_TEMP,dSP1.
Only logged (historicized) variables can be mapped. If a variable isn’t logged, the import will reject it — see Step 6. Pick the parameters you actually trend.
For our example we’ll use:
| Device | Code | Variables |
|---|---|---|
| IR33 #1 | 1.001 | AMB_TEMP (regulated temp), EVAP_TEMP (evaporator), SET_POINT, HYST_SETPT |
| uChiller | 9.001 | dSP1, dSP2 (discharge pressure), SEtC (cooling SP), SEtH (heating SP) |
Step 5.2 — Write a placeholder
This is the one bit people get wrong. A placeholder is not a bare {{code}}. It’s a tiny JSON object inside a JSON string, using single quotes:
"Reading": "{{'id':'1.001|AMB_TEMP|VALUE'}}"
The id has three parts: deviceCode|variableCode|FIELD. FIELD is usually VALUE (the live value); it can also be LABEL, DESCRIPTION, or MEASUREUNIT for metadata. (There are also 'USEDCPU', 'MACADDRESS', etc. for system metrics, and 'DB|name' for a stored value.)
Step 5.3 — Choose the resource types
Pick types that exist in the schema your BOSS loaded — check with:
curl -sk "https://<your-boss>/redfish/v1/\$metadata" -H "X-Auth-Token: $TOKEN"
We use the standard ones: Sensor for a reading (read-only Reading), Control for a setpoint (writable SetPoint), grouped under a Chassis.
Step 5.4 — Build the folder tree
The folders mirror the URLs. Our template looks like this:
Chassis/
├── index.json                         → /redfish/v1/Chassis            (the collection)
├── BOSS/        index.json + Sensors/ (CpuTemp, CpuLoad, MemoryUsage, DiskFree, Uptime)
├── IR33_1/
│   ├── index.json                     → /redfish/v1/Chassis/IR33_1
│   ├── Sensors/  (RoomTemp, EvapTemp)
│   └── Controls/ (SetPoint, Hysteresis)
└── uChiller/
    ├── Sensors/  (DischargePress1, DischargePress2)
    └── Controls/ (CoolSetPoint, HeatSetPoint)
A collection lists its children as reference links:
{
  "@odata.id": "/redfish/v1/Chassis",
  "@odata.type": "#ChassisCollection.ChassisCollection",
  "Name": "Chassis Collection",
  "Members@odata.count": 3,
  "Members": [
    { "@odata.id": "/redfish/v1/Chassis/BOSS" },
    { "@odata.id": "/redfish/v1/Chassis/IR33_1" },
    { "@odata.id": "/redfish/v1/Chassis/uChiller" }
  ]
}
A chassis carries identity and points to its sub-collections:
{
  "@odata.id": "/redfish/v1/Chassis/IR33_1",
  "@odata.type": "#Chassis.v1_25_2.Chassis",
  "Id": "IR33_1",
  "Name": "IR33 DIN-F #1",
  "ChassisType": "Module",
  "Manufacturer": "CAREL INDUSTRIES S.p.A.",
  "Model": "IR 33 DIN - F",
  "Sensors":  { "@odata.id": "/redfish/v1/Chassis/IR33_1/Sensors" },
  "Controls": { "@odata.id": "/redfish/v1/Chassis/IR33_1/Controls" }
}
A sensor (a live temperature):
{
  "@odata.id": "/redfish/v1/Chassis/IR33_1/Sensors/RoomTemp",
  "@odata.type": "#Sensor.v1_10_1.Sensor",
  "Id": "RoomTemp",
  "Name": "Regulated Temperature",
  "ReadingType": "Temperature",
  "ReadingUnits": "Cel",
  "Reading": "{{'id':'1.001|AMB_TEMP|VALUE'}}"
}
A control (a writable setpoint):
{
  "@odata.id": "/redfish/v1/Chassis/IR33_1/Controls/SetPoint",
  "@odata.type": "#Control.v1_5_2.Control",
  "Id": "SetPoint",
  "Name": "Regulation Set Point",
  "ControlType": "Temperature",
  "SetPointUnits": "Cel",
  "SetPoint": "{{'id':'1.001|SET_POINT|VALUE'}}"
}
Gotcha worth its own line: resource ids (the
Idand the last URL segment) must be valid OData identifiers — letters, digits, underscore. No dashes.IR33-1passes the file check but fails at runtime withInvalidURI;IR33_1works. This one cost us a round-trip.
Step 5.5 — Zip it
Zip so that Chassis/ sits at the root of the archive:
zip -r boss-redfish-template.zip Chassis
Want a head start? Download our ready-made template (BOSS + IR33 + uChiller) and adapt the codes to your plant.
6. Import the template
Back on the Redfish Server page:
- Upload template → choose your
.zip→ click the import button. - Read the result. Green = success. Red = a precise error naming the file or placeholder, for example:
WRONG_PLACEHOLDER— that variable isn’t logged; remove it or enable logging.WRONG_FILENAME/ID_IS_NOT_CORRECT— a file isn’tindex.json, or its@odata.iddoesn’t match its folder.
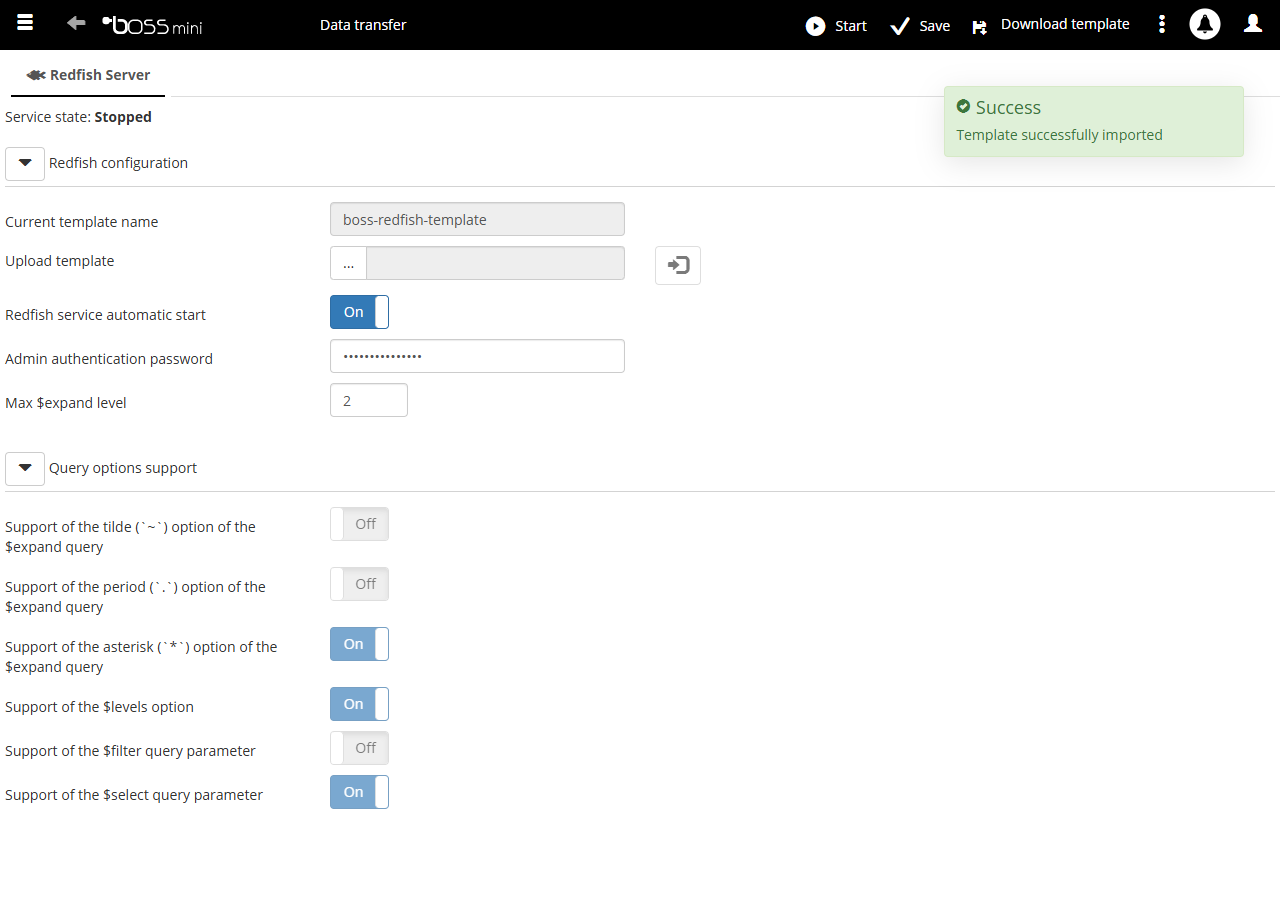
- Important: importing stops the service. Click Start again — only then does BOSS load your new resources.
That’s it — your devices are now live Redfish resources.
7. Browse it in Bruno
Bruno is a free, offline API client whose collections are just files on disk. Download the ready-made collection and unzip it — its tree mirrors what we built:
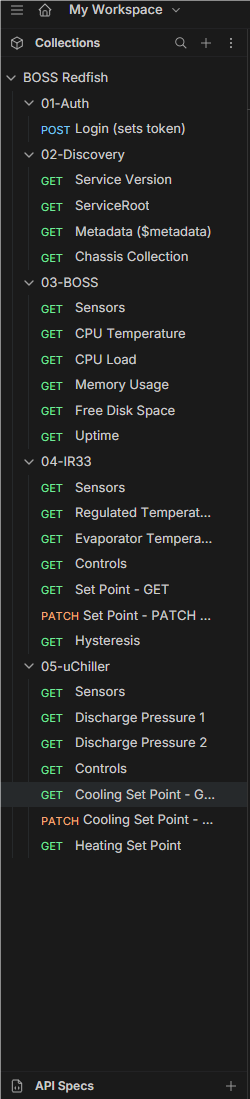
Setup (once):
- Bruno → Open Collection → pick the unzipped
boss-redfish-brunofolder. - Select the BOSS environment (top-right) and fill in
baseUrl,userandpasswordfor your BOSS (tokenfills itself after login). - Bruno → Preferences → turn off SSL/TLS Certificate Verification (self-signed cert).
Use it:
Run 01-Auth → Login first. A small post-response script grabs the X-Auth-Token header and stores it in {{token}}, so every other request is authenticated automatically.
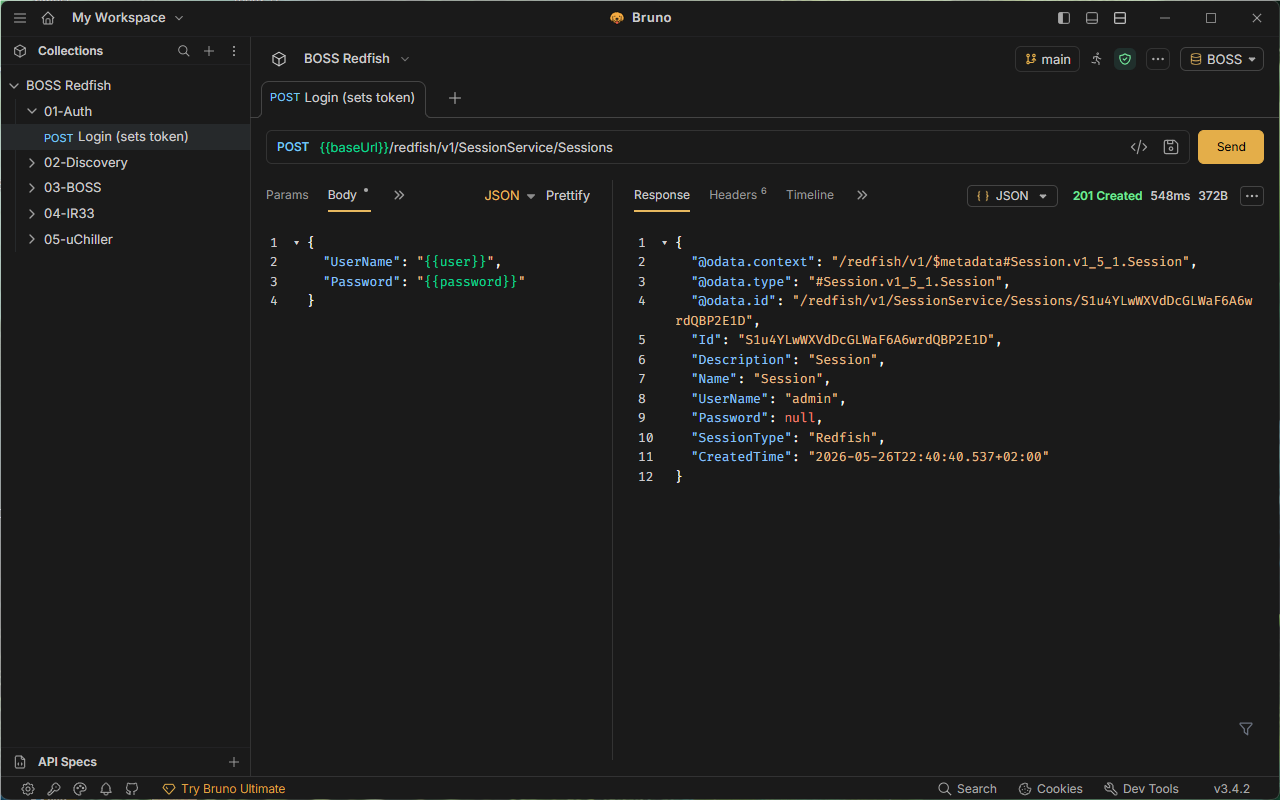
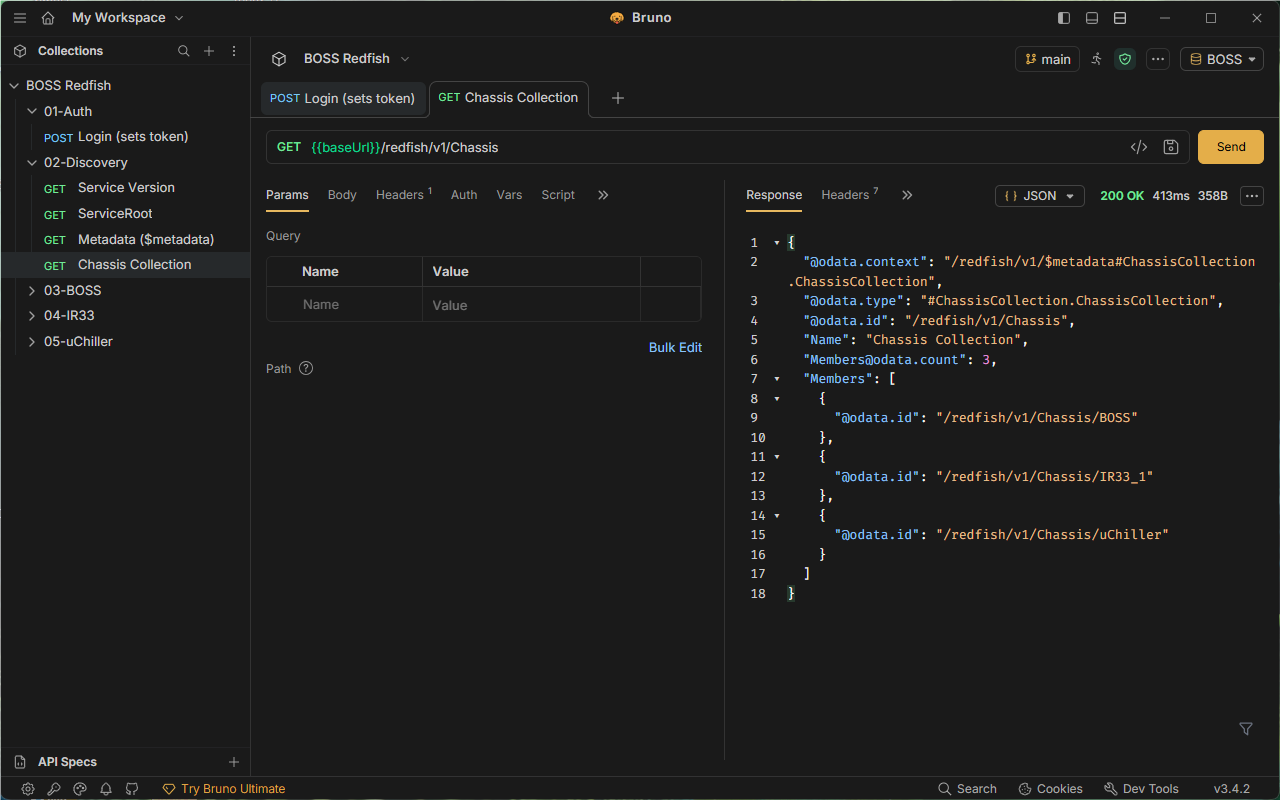
Now click through the tree. Chassis Collection shows your three devices:
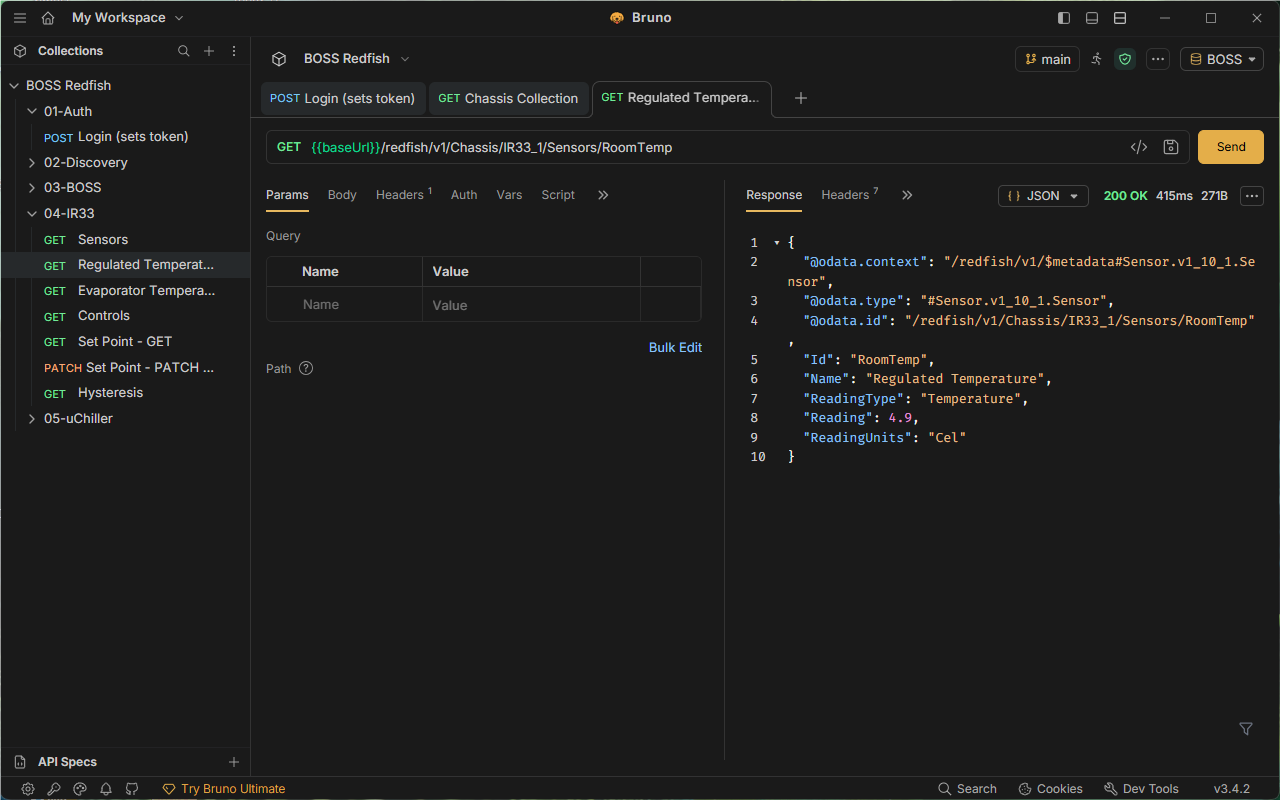
Open any sensor to see the live value — here the IR33 regulated temperature:
And the two-way part: send a setpoint with Set Point - PATCH. BOSS answers 204 No Content and forwards the command to the controller; re-run the matching GET to confirm the new value.
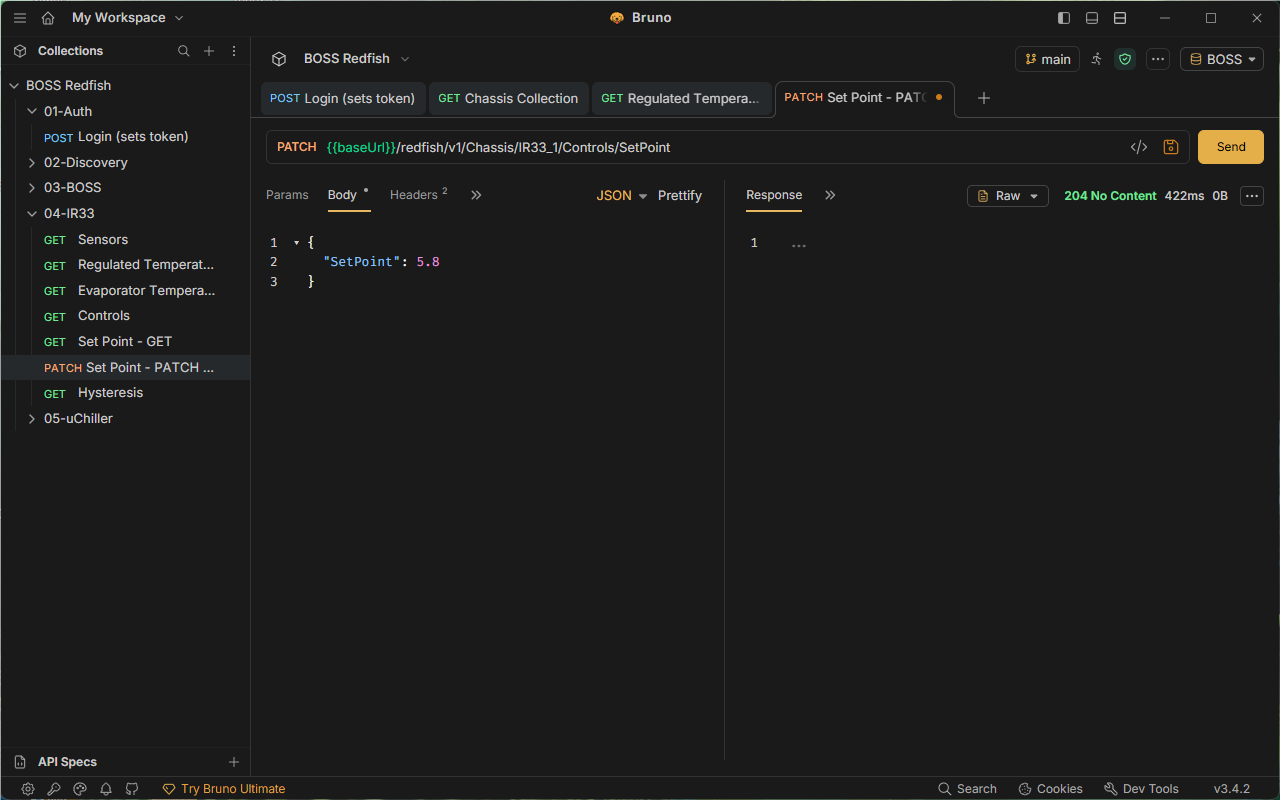
The token expires after a short idle period (60 s by default) — just run Login again. PATCH requests write to the real device.
Where we landed
Starting from a stopped plugin, we now have a standard Redfish API exposing live data from real controllers — IR33 temperatures, uChiller discharge pressures, writable setpoints — browsable in any REST tool. The recipe is reusable: read your codes from acquiredp, write index.json files with {{'id':'DEVICE|VARIABLE|VALUE'}} placeholders, zip, import, start.
From here you can model the rest of your plant the same way — every controller wired to BOSS can become a clean, integrable Redfish resource.